Hey guys, this is going to be the guide where you can get how to download PICMA for PC and I’m going to let you know about the thing is pretty simple ways. You need to go through the guide I’m sharing down here and within a few minutes, you’ll be done with everything. Then you can start using this PICMA Android App at your computer.
The guide I’m sharing down here is going to work on any Windows and Mac computer and you don’t need to worry about anything since it will be a complete step by step process. You simply need to go through whatever I’ll be sharing with you and that’s all will be done from my end.
I’ll be sharing the features of PICMA PC first so that you can come to know exactly what it’s all about and how it’s going to benefit you in using it on your computer. You’re aware of the fact that PICMA App isn’t available officially for the PC platform but still, there is a way to do the same. If you find any trouble then just write it down in the comment section and I’ll bring out the solution as soon as I can.
About PICMA App
Here is PicMa, your online photo-enhancing AI partner.
Based on leveraging state-of-the-art AI technologies, we provide you with top-notch photo enhancement and colouring effects, along with powerful portrait processing AI technologies for you to create unique selfies or restore your shabby old photos. With only one click, your photo quality will be improved without losing its detail and nature.
What’s more, there are various artistic filters for you. You can create your personal cartoon or comic-style avatar, get the magic photo like Harry Potter, or change the sky behind you to a milky way or a pink cloud and sunset. You can share those special photos with your friends on social media extremely easily and have more fun with others!
Anytime, anywhere, you only need a mobile phone to get the world’s best film-grade image processing services!
KEY Features:
– Enhance/Enhance Pro: Clean noise on photos and improve their quality without losing detail and nature;
– Restore Old Photo: Convert blurry, broken and old photos to high quality;
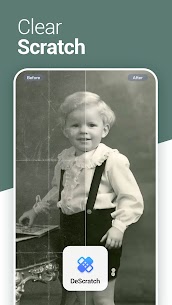
– DeScratch: Easily restore damaged photos such as scratches, creases, etc;
– Colorize: Colourize black and white family photos, restore cherished memories;
– Selfie Enhance: Retouch and tune your face portrait;
– Cartoon Style/Comic Animator: Turn your photos into popular American comic style and animate them into smiley cartoons;
– Face Animator: Bring your photos to life;
– Sky Box: Draw a beautiful sky randomly and beautify the background of your photos;
– Painting: Turn your cherished photos into beautiful paintings;
– Toon face: Get your special cartoon avatar.
PicMa gives you a perfect enhanced/artistic photo or animated video, ready to share and get the most likes on Instagram, TikTok, Snapchat, Facebook, Twitter or your favourite chat group!
Terms of Use: https://magictiger.ai/picma/termsofuse.html
Privacy Policy: https://magictiger.ai/picma/privacypolicy.html
🤗Stay tuned 🙂
CONNECT WITH US
Facebook.com/PicMaAI
Twitter.com/PicMaAI
Instagram.com/picma_official
picma_support@magictiger.ai
Method 1: Procedure to Download PICMA for PC using Bluestacks Emulator
PICMA is an Android app and so you will require a nice Android emulator for using it on PC. Bluestacks is the most popular emulator which people use nowadays on their PC. Now, follow the below steps to download the PICMA PC version.
- First of all, you have to go to the website of Bluestacks and later tap on the button “Download Bluestacks 5 Latest Version”.
- Now go to the download folder and double click on the setup file to start the installation.
- Then the installation process begins in some seconds.
- You will have to give some clicks until you get the “Next” option.
- The next step is to hit the “Install” button and the procedure will start in some seconds.
- Further, tap on the “Finish” button.
- The next step is to open Bluestacks and go in the search column and write “PICMA”.
- Further, you have to click on the option “Install” which appears in the right-hand corner.
- The next step is to click on the icon of the app and start using the PICMA app.
Method 2: How to install PICMA Apk PC With Bluestacks Emulator
- Once the file is downloaded, then you need to begin installing the process. Start going through the on-screen instructions and within a few minutes, the software will be ready to use.
- Also Download PICMA Apk from the download button above.
- Once Bluestacks is ready for use, start it and then go to the Home option which is available within its UI.
- Now You can see the personalized option just beside the option you will see 3 dots (see screenshot).
- Click on the install Apk option as shown in the image.
- Click on it and locate the PICMA Apk file which you have downloaded on your PC.
- It will take a few seconds to get installed.
Method 3: PICMA Download for PC using MEmuplay Emulator
- First download MEmuplay from its official website.
- Once it is downloaded then double click on the file to start the installation process.
- Now follow the installation process by clicking “Next”
- Once the installation process is finished open MEmuplay and go in the Search column and type “PICMA”.
- Further click on the “Install” button which appears on the screen of the MEmuplay emulator, once the installation process has been done you can now use PICMA on PC.
Conclusion
This is how you can download PICMA app for PC. If you want to download this app with some other Android emulator, you can also choose Andy, Nox Player and many others, just like Bluestacks all android emulator works same.